
It has been a while since we posted because I've been hard at work creating all sorts of new things for you. These Storyboards are our newest item just created today and I just couldn't wait to share. You can find these in our Etsy store at http://www.etsy.com/listing/54768170/8x10-storyboard-collage-template-set-of
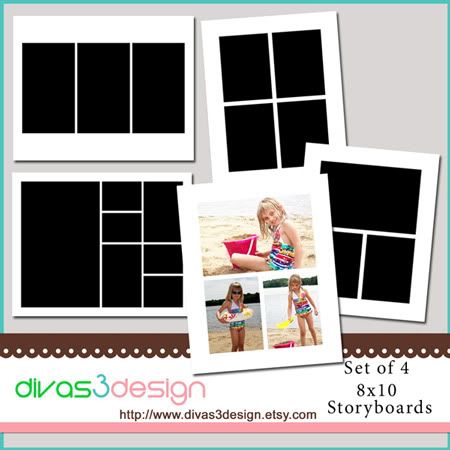
Storyboards are a very artistic way of displaying your photos. They can be framed or mounted on storyboard. These are perfect for you photographers out there.
These storyboard or collage templates come in a set of 4 8x10 PSD files with clipping masks. If you don't know how to use clipping masks keep reading my tutorial below.
Clipping Mask Tutorial
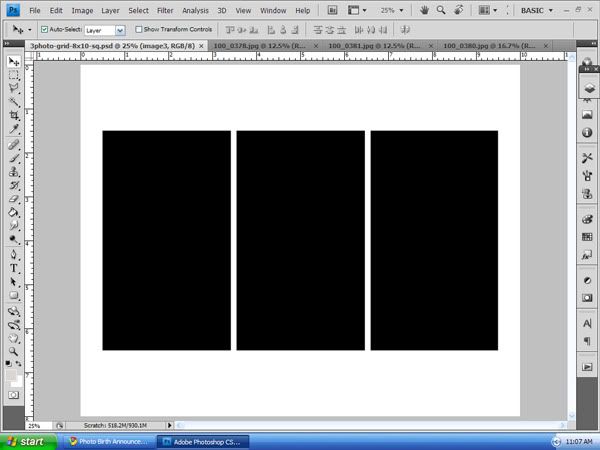
The first step is to open the storyboard template and your photos in photoshop.
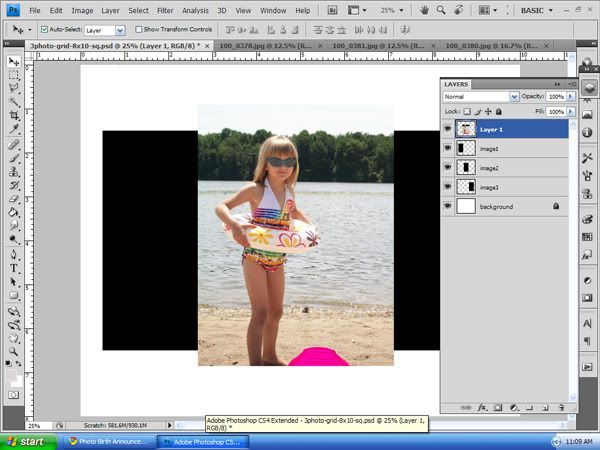
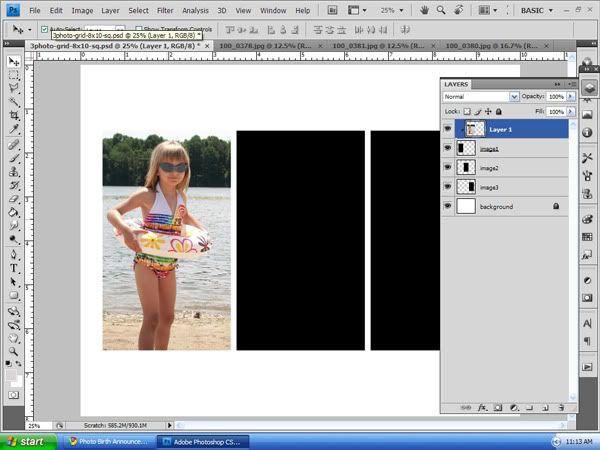
Now that you have your files open. Drag one of your photos onto the storyboard template. Place the photo layer directly above the clipping mask layer where you want your photo placed.
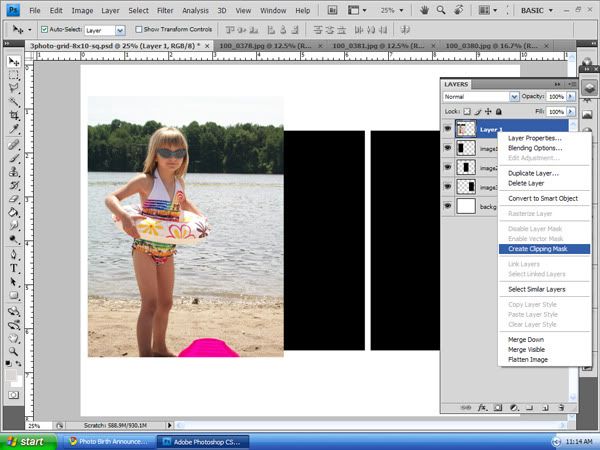
In your layers palette click and select your image layer. Now right click and select clipping mask. Or use the keyboard shortcut Ctrl +Alt+G (on PC) or Command + option + G (on Mac)
Your photo is now formed to the size of the clipping mask. You may now drag your photo around and position it as needed and you can resize it as usual.
And that is how you use clipping masks in photoshop. Repeat for each image until you complete your storyboard. I hope you enjoyed this tutorial, good luck and enjoy.

Storyboards are a very artistic way of displaying your photos. They can be framed or mounted on storyboard. These are perfect for you photographers out there.
These storyboard or collage templates come in a set of 4 8x10 PSD files with clipping masks. If you don't know how to use clipping masks keep reading my tutorial below.
Clipping Mask Tutorial
The first step is to open the storyboard template and your photos in photoshop.
Now that you have your files open. Drag one of your photos onto the storyboard template. Place the photo layer directly above the clipping mask layer where you want your photo placed.
In your layers palette click and select your image layer. Now right click and select clipping mask. Or use the keyboard shortcut Ctrl +Alt+G (on PC) or Command + option + G (on Mac)
Your photo is now formed to the size of the clipping mask. You may now drag your photo around and position it as needed and you can resize it as usual.
And that is how you use clipping masks in photoshop. Repeat for each image until you complete your storyboard. I hope you enjoyed this tutorial, good luck and enjoy.


0 comments:
Post a Comment